Composting in a Small Garden or on a Balcony
Composting in a Small Garden or on a Balcony
Many people assume composting is only for those with sprawling gardens, a dedicated veg patch, or at least a decent-sized lawn. In reality, composting is entirely achievable in a small urban garden, a courtyard, or even on a balcony several floors up. With the right approach, the right container, and a basic understanding of what goes in and what stays out, you can turn your kitchen and household waste into rich, dark compost that genuinely improves your growing conditions – without needing much space at all.
This guide is aimed at beginners in the UK who are working with limited outdoor space. Whether you have a two-metre square patio, a raised bed on a rooftop, or a single planter on a Juliet balcony, there is a composting method that will work for you.
Why Bother Composting?
Before getting into the practicalities, it is worth understanding what composting actually achieves. When organic material – vegetable peelings, cardboard, garden trimmings – breaks down through natural microbial activity, it produces humus-rich compost. This compost acts as a soil conditioner, improving drainage in heavy clay soils and helping sandy soils retain moisture. It also introduces beneficial organisms into your growing medium and reduces your reliance on shop-bought composts and fertilisers.
From an environmental standpoint, composting at home diverts organic waste from landfill, where food scraps break down anaerobically and produce methane – a greenhouse gas considerably more potent than carbon dioxide. According to WRAP (Waste and Resources Action Programme), UK households throw away approximately 6.6 million tonnes of food waste each year. Even a small household composting operation makes a measurable contribution to reducing that figure.
There are also practical financial benefits. Good-quality peat-free compost from garden centres such as Dobbies, Wyevale, or local independent nurseries is not cheap. Producing your own supply, even in modest quantities, reduces what you need to buy.
Understanding the Basics: What Makes Compost Work
Composting relies on a balance of two broad categories of material, commonly referred to as “greens” and “browns.”
- Greens are nitrogen-rich materials that break down quickly and provide the energy microorganisms need to get to work. Examples include vegetable and fruit peelings, tea bags (if plastic-free), coffee grounds, fresh grass clippings, and plant trimmings.
- Browns are carbon-rich materials that break down more slowly and provide structure to the compost heap, preventing it from becoming a soggy, airless mass. Examples include cardboard, torn-up newspaper, paper bags, dried leaves, straw, and egg boxes.
A healthy compost pile needs roughly equal volumes of greens and browns, though this does not need to be precise. The key is to avoid dumping large quantities of just one type. A heap made entirely of grass clippings will turn into a slimy, smelly mat. A heap made entirely of cardboard will barely decompose at all. Alternate layers and mix materials together where possible.
Air and moisture are also essential. Microorganisms need oxygen to function, which is why turning or aerating your compost speeds up the process. The material should feel roughly as damp as a wrung-out sponge. Too dry, and decomposition slows dramatically. Too wet, and the heap becomes anaerobic and begins to smell unpleasant.
What You Can and Cannot Compost
Knowing what to include – and what to keep out – is particularly important when composting in a small space, where any problems with smells or pests are more likely to affect you and your neighbours.
Suitable for home composting:
- Raw fruit and vegetable peelings and scraps
- Tea leaves and plastic-free tea bags
- Coffee grounds and paper filters
- Crushed eggshells
- Grass clippings (in thin layers)
- Soft plant trimmings and annual weeds (not seeded)
- Cardboard (torn into pieces, with tape removed)
- Newspaper and plain paper
- Hair (human and pet) and nail clippings
- Wood ash in small quantities
- Fallen leaves
Do not add:
- Cooked food, meat, fish, or dairy products – these attract rats and other vermin
- Diseased plants
- Perennial weeds such as bindweed, couch grass, or ground elder, which may survive and spread
- Cat or dog faeces
- Nappies or sanitary products
- Coal or coke ash (wood ash is fine in small amounts)
- Glossy or heavily printed paper
- Any material treated with persistent pesticides
It is worth noting that UK councils vary in what they collect through food waste and garden waste bins, so if you are unsure whether something is compostable at home, your local council website is a reliable first reference point. Many councils – including those in Greater Manchester, Bristol, and Edinburgh – provide detailed guidance tailored to their collection systems.
Choosing the Right Composting Method for Small Spaces
This is where small-space composting differs most significantly from traditional large-heap composting. You have several practical options, each with different requirements in terms of space, cost, and the type of waste they can handle.
Compact Compost Bins
A standard compost bin – the kind of lidded, bottomless plastic unit you may have seen in allotments or back gardens – can fit in surprisingly small spaces. A bin with a 220-litre capacity typically has a footprint of roughly 60 x 60 centimetres, small enough to tuck into a corner of a courtyard or against a fence. Many UK councils offer subsidised compost bins through schemes run in partnership with GetComposting (now managed through various regional programmes). It is worth checking your council’s website before buying one at full price; a bin that retails at £40-£50 may be available for under £20 through a local scheme.
These bins work well for garden and kitchen waste but require a base of soil or lawn for worms and other organisms to enter from below. If you are on a hard surface such as concrete or paving slabs, you will need to place a layer of garden soil or finished compost in the base to introduce the necessary biology, and ensure drainage is not an issue.
Tumbler Composters
Tumbler composters are sealed, barrel-shaped units mounted on a frame that allows you to rotate them. They are particularly well-suited to small gardens and patios because they are fully enclosed – reducing the risk of pests – and they sit entirely above ground, meaning they can be used on any hard surface, including a balcony. Brands such as Blackwall and Envirocycle produce models widely available through UK garden centres and online retailers.
The rolling action mixes and aerates the contents, which speeds up decomposition. A tumbler can produce finished compost in as little as six to eight weeks in warm weather, compared to several months for a static bin. The trade-off is cost – a decent tumbler typically costs between £60 and £120 – and capacity, as most domestic models hold between 60 and 140 litres.
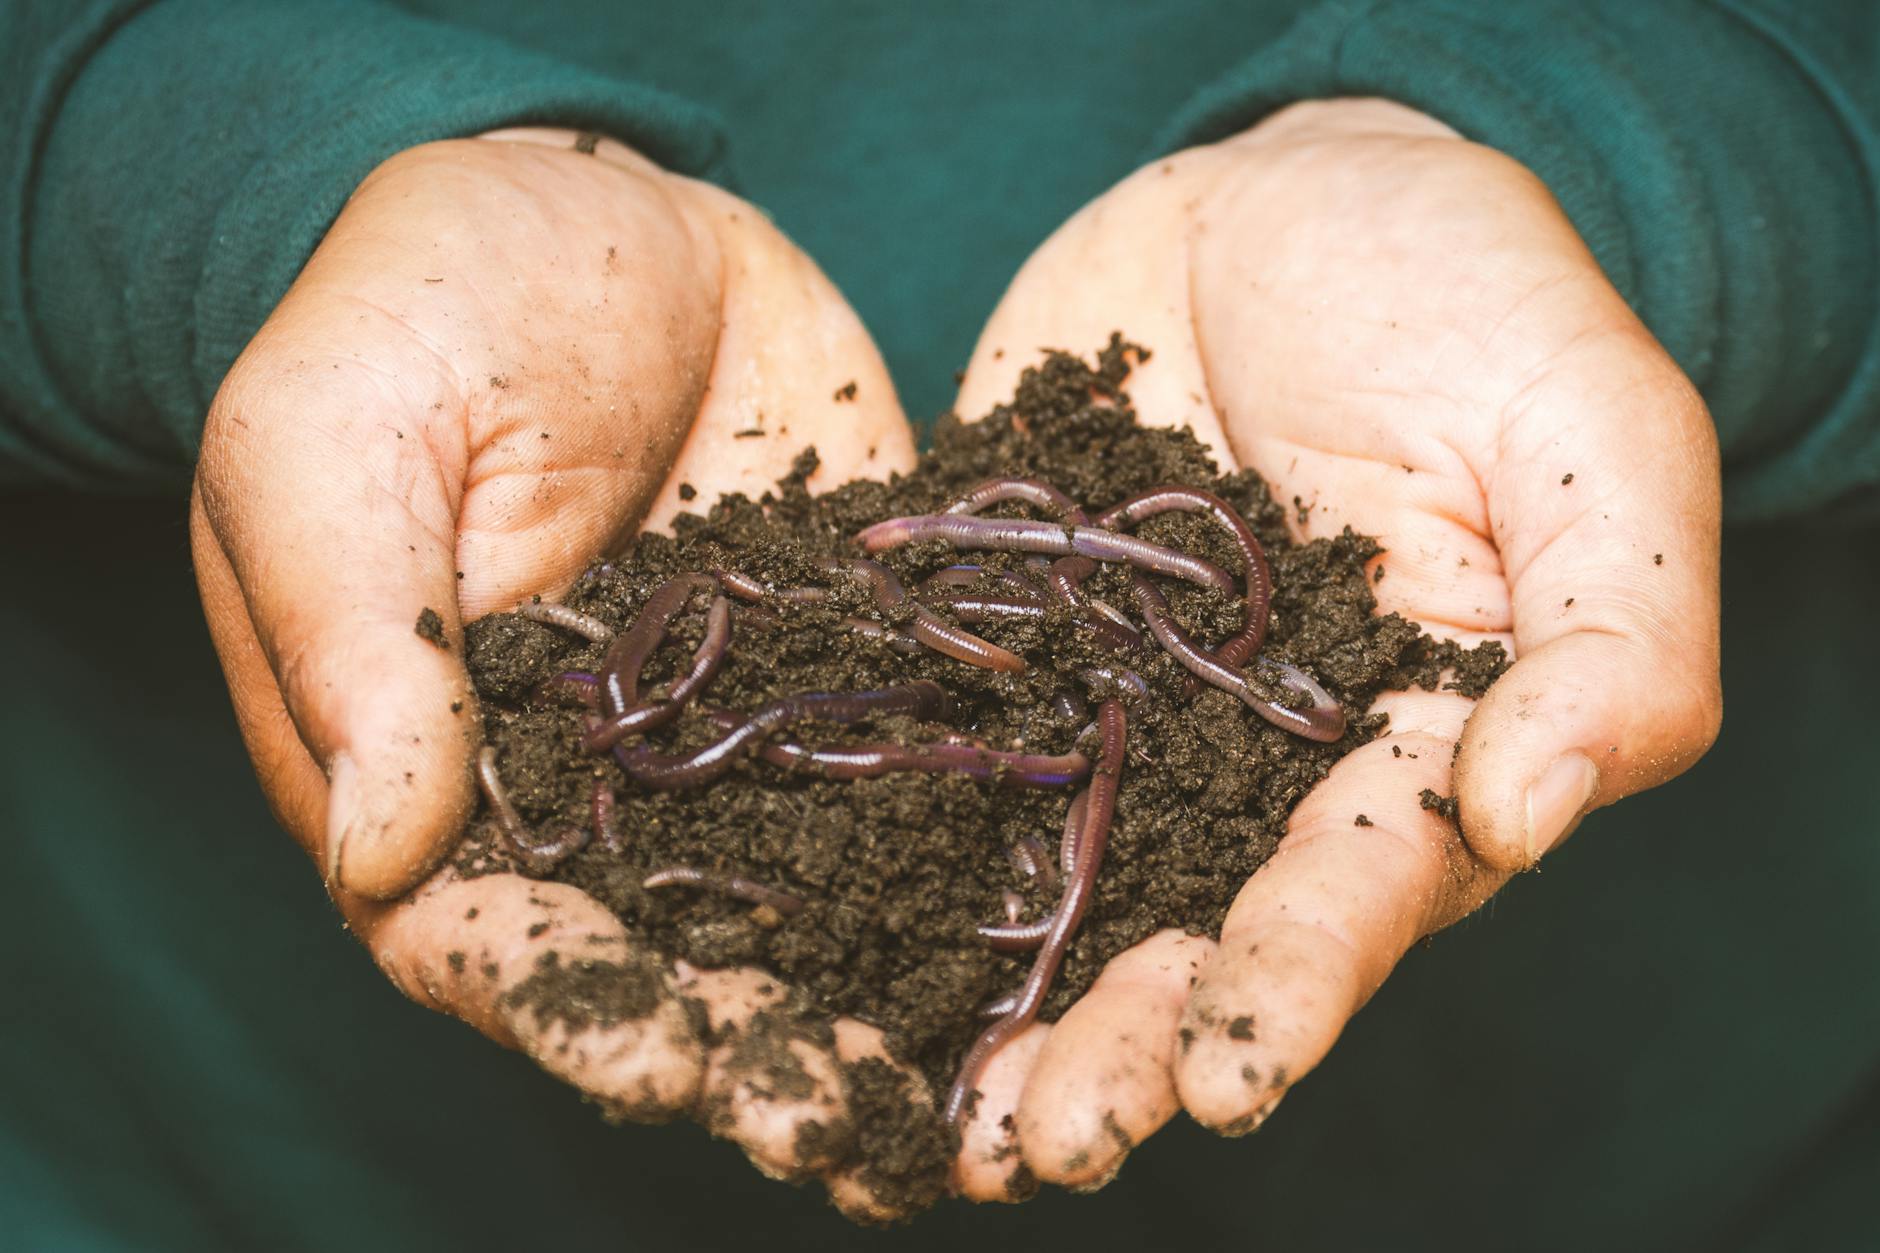
Wormeries
A wormery (also called a worm composter or vermicomposter) uses a specific species of composting worm – most commonly Eisenia fetida, known as red wigglers or tiger worms – to process organic material. It is one of the most compact composting options available, and it can be used indoors, in a shed, or on a covered balcony.
Wormeries process kitchen scraps efficiently, though they have a lower capacity than bin or tumbler systems and require more active management. The worms need to be kept within a temperature range of roughly 10-25°C, which means they should be moved somewhere sheltered – a garage, utility room, or kitchen – during cold UK winters. They also should not be overfed, and certain materials (citrus in large quantities, onions, spicy foods) can cause problems.
In return, a wormery produces two valuable outputs: worm castings (an exceptionally rich, fine compost ideal for potting mixes and top-dressing) and worm liquid (a concentrated liquid feed that should be diluted roughly 10:1 with water before use on plants). UK suppliers including Original Organics, Wiggly Wigglers, and The Worm Farm supply starter kits including worms, bedding, and detailed instructions.
Bokashi Fermentation
Bokashi is a Japanese fermentation method that uses a bran inoculated with effective microorganisms (EM) to ferment kitchen waste – including cooked food, meat, and fish, which cannot go into a standard compost bin. The process is entirely anaerobic and takes place inside a sealed bucket, making it completely suitable for use indoors or on a balcony. There is no smell during the process provided the bucket is kept sealed; when you open it, the fermenting material has a sharp, pickled odour, but this is not unpleasant to most people.
Bokashi does not produce finished compost on its own. After approximately two weeks of fermentation, the material needs to be buried in soil or added to an outdoor compost bin, where it breaks down rapidly – often within two to four weeks. For balcony growers, the fermented material can be dug into a large planter or mixed into a compost bin if one is available. Bokashi starter kits, including buckets and bran, are available from UK suppliers such as Wiggly Wigglers and Green Johanna stockists.
Step-by-Step: Getting Started with a Compact Compost Bin
If you are new to composting and have even a small outdoor space with a flat surface, a compact compost bin is the most straightforward place to start. Here is how to set one up correctly from the
First, choose a spot that receives partial shade — full sun can dry out the contents too quickly, whilst deep shade slows decomposition. Place the bin directly onto bare soil if possible, as this allows worms and beneficial organisms to migrate up into the heap. If you are on a hard surface such as a patio, lay a square of damp cardboard or a handful of soil and worms beneath the bin to introduce microbial life. Add a base layer of coarse, woody material — torn cardboard, woody prunings, or scrunched newspaper — to aid airflow from the bottom. Then begin adding your green and brown materials in rough alternating layers, aiming for a ratio of roughly one part green kitchen and garden waste to two parts brown carbon-rich material. Water lightly if the contents feel dry, and replace the lid securely after each addition.
Over the following weeks, turn the contents every seven to ten days using a garden fork or a long-handled compost aerator, which is particularly useful in confined spaces. Check the moisture level each time you turn it — the material should feel like a wrung-out sponge. If it smells strongly of ammonia, add more brown material and turn it again. If it looks dry and is not breaking down, add a splash of water and a handful of fresh grass clippings or vegetable peelings. In a compact, well-managed bin, you can expect usable compost from the lower section within three to six months, depending on the season and what you have been adding.
Conclusion
Composting in a small garden or on a balcony is entirely achievable with a modest investment of time and the right equipment. Whether you opt for a compact outdoor bin, a wormery on a sheltered balcony, or a Bokashi system under the kitchen sink, each method turns everyday waste into something genuinely useful. Starting small, staying consistent, and adjusting as you learn will quickly make composting a natural part of your gardening routine rather than a chore.