Worm Composting (Vermicomposting) at Home
Worm Composting (Vermicomposting) at Home
If you’ve been meaning to do something useful with your kitchen scraps but a standard compost heap feels like a bit much — too big, too smelly, too much like hard work — then worm composting might be exactly what you’ve been looking for. It’s compact, surprisingly low-maintenance, and genuinely fascinating once you get going. A wormery can sit happily on a balcony, in a shed, under the kitchen sink, or in a corner of the garden, and it will quietly turn your vegetable peelings and teabags into some of the finest compost and liquid plant feed you can get your hands on. All with very little effort from you.
This guide walks you through everything you need to know to get started with vermicomposting in the UK — from choosing the right worms to troubleshooting a bin that’s gone a bit wrong. Let’s get into it.
What Is Vermicomposting, Exactly?
Vermicomposting is the process of using worms to break down organic matter into a rich, dark compost called worm castings (or vermicast). Unlike a traditional compost heap, which relies on microbial activity and heat to break down materials, a wormery works at room temperature and is driven primarily by the worms themselves — though microbes still play a supporting role.
The end product comes in two forms. First, you get solid worm castings: a dark, crumbly material that’s exceptionally rich in nutrients and beneficial microorganisms, and is widely considered one of the best soil amendments available. Second, you get liquid leachate — sometimes called “worm tea” — which drains from the bottom of the bin and, when diluted, makes an excellent liquid fertiliser for houseplants and garden beds.
The whole system is contained, tidy, and virtually odour-free when managed correctly. That last point tends to surprise people, because the assumption is that anything involving decomposing food must smell. Done right, a wormery smells pleasantly earthy at worst — like a handful of fresh soil.
The Right Worms for the Job
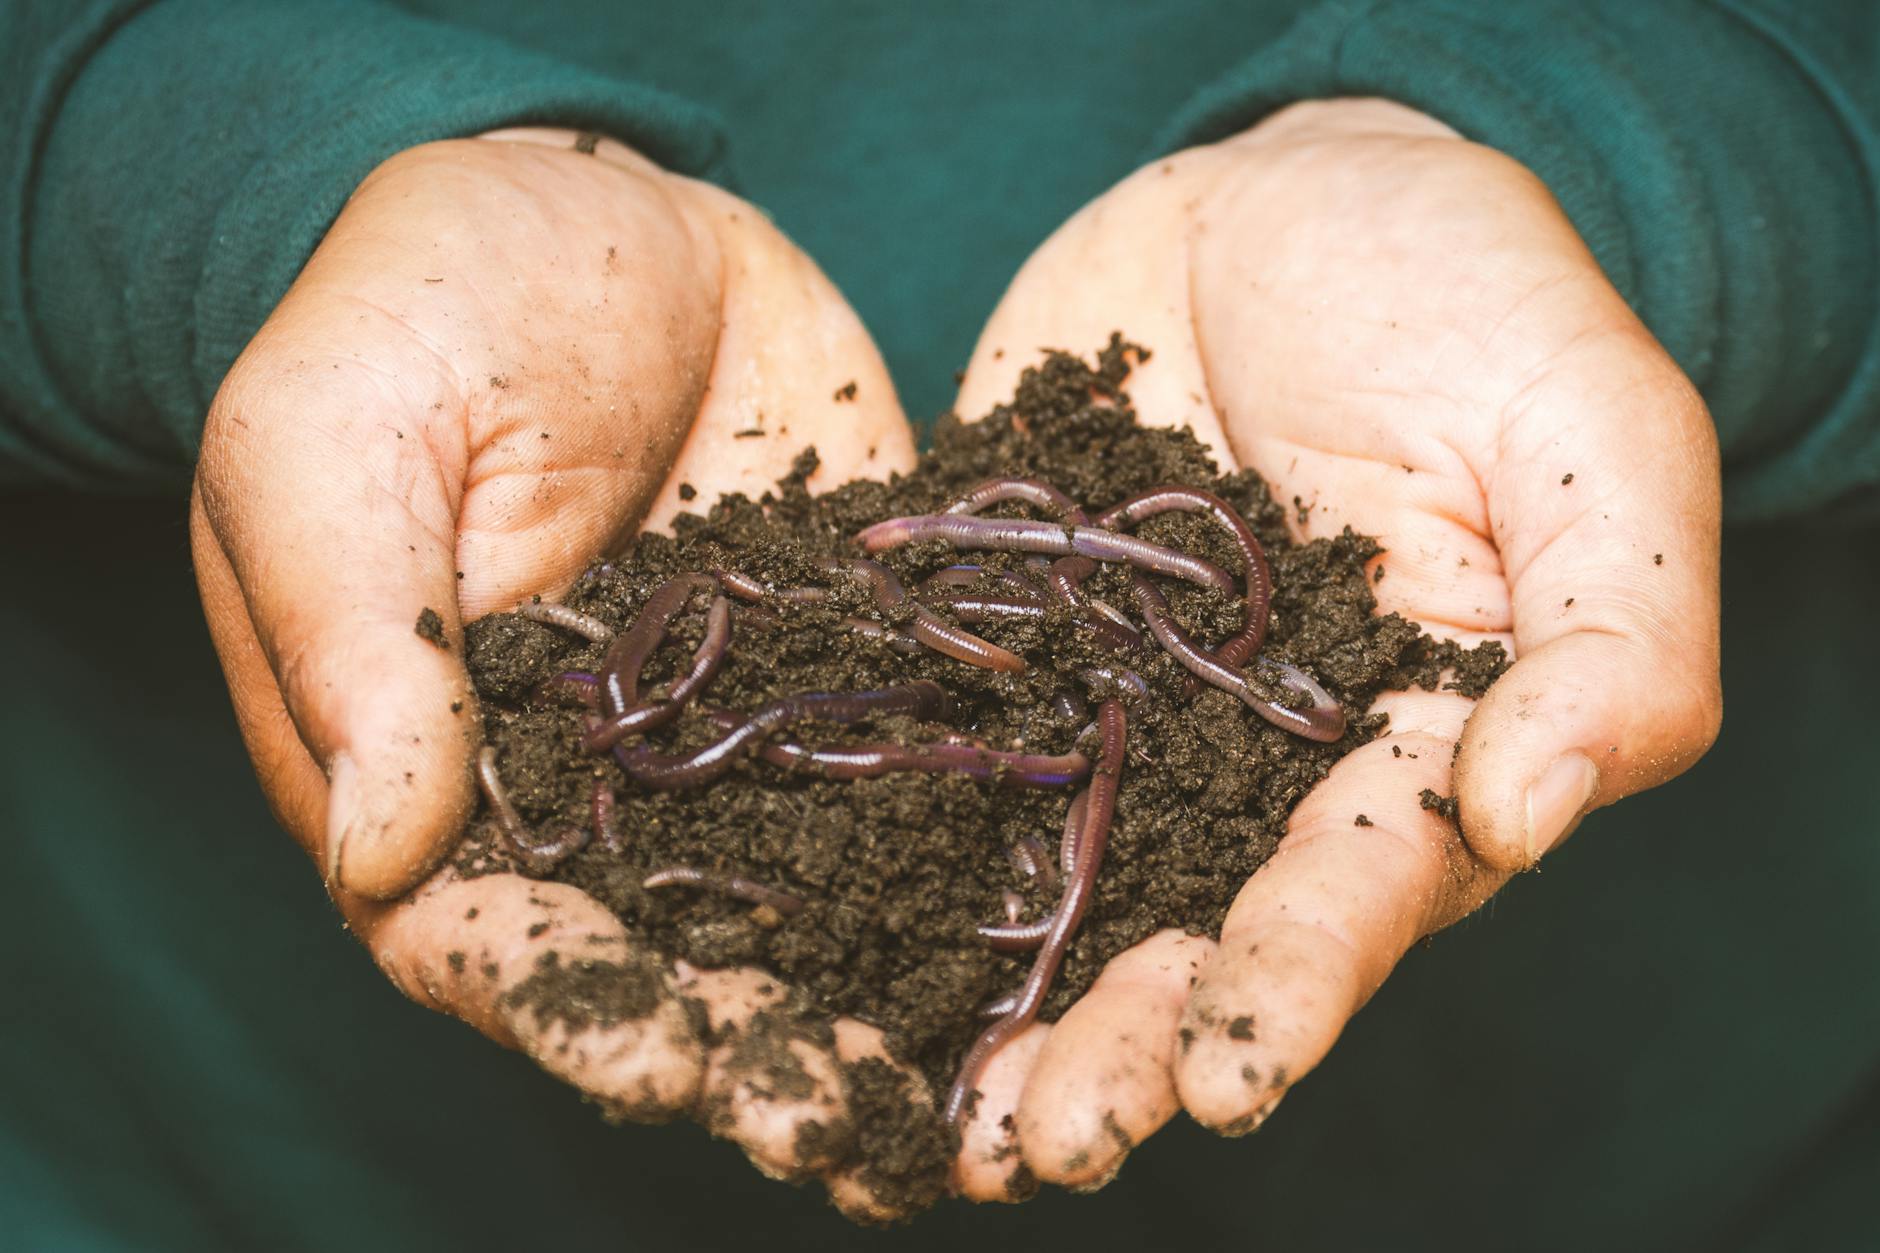
This is one of the most important things to understand before you start: you cannot use ordinary garden earthworms in a wormery. The large, pale worms you might dig up in a flowerbed are soil dwellers — they move through the earth vertically and don’t thrive in a confined composting environment.
What you need are surface-dwelling composting worms, and in the UK, there are two species you’ll commonly come across:
- Eisenia fetida — the red wiggler or tiger worm. These are the most popular composting worm worldwide, reddish-brown with pale yellow banding, and extremely effective at processing organic waste.
- Lumbricus rubellus — sometimes sold as a brandling worm. Also a composting species, though slightly larger and a bit slower than Eisenia fetida.
You can buy composting worms from a range of UK suppliers. Original Organics, Wiggly Wigglers (based in Herefordshire), and Worms Direct are all well-regarded options with good reputations. Many people also pick up worms when they buy a starter wormery kit, which typically comes with a small population included.
For a standard home wormery, you’ll want to start with roughly 500g to 1kg of worms. This sounds like a lot but is actually a relatively modest population — somewhere between 500 and 1,000 individuals. The good news is that worms reproduce readily in a healthy bin, so your population will grow naturally over time to match the amount of food you’re adding.
Choosing Your Wormery
You have two main options: buy a ready-made wormery, or build your own. Both work perfectly well.
Ready-made wormeries are widely available from garden centres and online retailers across the UK. The Can-O-Worms and the Worm Cafe are popular multi-tray systems that many UK beginners start with. These work on a stacking principle: as worms finish processing one tray, they migrate upwards through mesh floors into the next tray where fresh food has been added, leaving finished compost behind in the lower tray. It’s a neat system and makes harvesting the compost very straightforward.
DIY wormeries are just as effective and considerably cheaper. A pair of stacking storage boxes — the kind you’d find at Wilko, B&Q, or IKEA — works brilliantly. You drill ventilation holes around the upper half of the inner box and drainage holes in the base, then nest it inside the outer box to catch any leachate. Line the inner box with damp cardboard or newspaper to start, add your bedding, introduce the worms, and you’re away.
Whatever system you choose, it needs adequate ventilation (worms need oxygen), drainage (they’ll drown in waterlogged conditions), and the ability to keep moisture in while preventing it from pooling at the base where the worms live.
Setting Up Your Wormery: A Step-by-Step Guide
- Choose your location. Worms are happiest between 15°C and 25°C. In the UK, this means keeping your wormery indoors or in a sheltered spot — a garage, shed, or utility room — during the colder months. Summer garden placement is fine as long as it’s out of direct sunlight, which can overheat the bin very quickly.
- Prepare your bedding. Before the worms arrive, you need to create a comfortable home for them. Torn, dampened cardboard (cereal boxes, egg cartons), shredded newspaper, coir (coconut fibre), or a mix of these materials all work well. The bedding should feel like a wrung-out sponge — moist but not dripping. Fill your bin to about a third of its depth.
- Add a small amount of garden soil or finished compost. Just a handful or two. This introduces the microorganisms that help break down food and keeps the pH balanced.
- Introduce your worms. Place them on top of the bedding and leave the lid off for an hour or two. Worms dislike light, so they’ll quickly burrow down into the bedding. This is a good sign.
- Wait before feeding. Give the worms two or three days to settle in before adding any food scraps. They’ve been through a stressful journey and need time to acclimatise.
- Start feeding small quantities. In the first few weeks, add only modest amounts of food — a small handful every few days — and observe how quickly it disappears. As the population grows and becomes established, you can gradually increase the amount.
- Maintain moisture and airiness. Check the bedding regularly. If it feels dry, mist it lightly with water. If it seems compacted, gently loosen it with a fork. Adding torn cardboard periodically helps maintain structure and absorbs excess moisture.
What to Feed Your Worms
Worms are not fussy eaters, but there are some things they’ll process enthusiastically and others you should avoid entirely. Here’s the practical breakdown:
Excellent worm food:
- Fruit and vegetable peelings and scraps
- Tea bags (remove the staple, and note that some bags contain plastic — look for biodegradable brands like Clipper or Pukka) and loose leaf tea
- Coffee grounds and paper coffee filters
- Crushed eggshells (these help regulate pH and grit aids digestion)
- Shredded cardboard, paper, and newspaper — these are carbon-rich and essential for balance
- Cooked plain rice or pasta in small amounts
- Grass clippings in thin layers (too thick and they mat and heat up)
- Dead leaves and plant trimmings that aren’t too woody
Things to avoid:
- Meat, fish, and bones — these attract pests and create unpleasant smells
- Dairy products for the same reason
- Citrus peel in large quantities — the acidity can stress worms, though small amounts are fine
- Onion and garlic in large amounts — worms genuinely seem to dislike them
- Spicy food or anything heavily salted
- Dog or cat faeces — these can harbour pathogens
- Glossy magazine paper or cardboard with heavy coloured printing
A useful rule of thumb is to aim for a roughly 50/50 mix of “greens” (wet, nitrogen-rich materials like food scraps) and “browns” (dry, carbon-rich materials like cardboard and paper). Too many greens and the bin becomes wet and acidic. Too many browns and it dries out and slows down. The balance is everything.
Harvesting Your Compost and Liquid Feed
After two to four months, you’ll start to see the lower portions of your bin turning into beautiful, dark, crumbly worm castings. These don’t look anything like the food that went in — they’re fine-textured, rich-smelling, and a deep chocolate brown.
To harvest the castings, the simplest method is to push all the contents to one side of the bin, add fresh bedding and food to the empty side, and wait. The worms will migrate across toward the fresh food over the next week or two, leaving the finished compost on the other side free to scoop out.
If you have a multi-tray system, harvesting is even easier — simply remove the bottom tray once the worms have moved up, and the castings are ready to use.
Use worm castings as a top dressing for houseplants, mix them into potting compost, sprinkle them around the base of garden plants, or work them into veg beds before planting. A little goes a long way — worm castings are more nutrient-dense than most commercial composts.
The liquid leachate that collects in the base of the bin should be diluted before
use. Mix it with water at a ratio of roughly 1:10 before applying it to the soil around plants. This diluted leachate makes an effective liquid feed and can be used on vegetables, fruit, and ornamentals throughout the growing season. Do not apply it neat, as the concentration of nutrients and acids can scorch roots and damage plants.
It is worth noting that leachate is not the same as worm tea, which is produced by actively aerating a solution of worm castings. Leachate quality can vary depending on what is in the bin at any given time, so if the bin has recently received a lot of acidic food waste, the leachate may be more acidic than usual. When in doubt, dilute more heavily rather than less. Stored in a sealed container out of direct sunlight, both castings and diluted leachate will keep for several weeks without losing their value.
Worm composting is one of the most practical and space-efficient ways to reduce household food waste in the UK, whether you live in a house with a garden or a flat with nothing more than a balcony. The process requires little effort once established, produces two genuinely useful outputs, and keeps organic material out of general waste. Start with a modest bin, a manageable amount of bedding, and a healthy batch of tiger worms, and the system will largely take care of itself.